
If you’re shorter than average you may have noticed something about stained glass: a lot of workshops and equipment seem to be designed for someone else.
A workbench feels too high. Your feet don’t quite reach the floor when you’re sitting. You find yourself leaning forward to see details or raising your shoulders just to hold a piece of glass comfortably. After an hour or two what should be a hobby can start feeling like hard work.
The good news is that you don’t need a different set of stained glass tools because you’re short. What matters most is choosing equipment that can be adjusted to your body arranging your workspace properly and making a smart changes before you start cutting glass.
In this guide we’ll look at the useful stained glass equipment for short people from adjustable workbenches and comfortable chairs to glass cutters, grinders, lighting and storage. I’ll also share some tips for setting up a small stained glass workspace and choosing beginner-friendly patterns that won’t make your first projects unnecessarily difficult.
Whether you’re just getting started or have been making glass for years a workspace that fits you can make a real difference.
Why Standard Stained Glass Equipment Can Be Difficult for Short People
Many stained glass tools are designed for use but the workbench and seating arrangement can be a different story.
For example a fixed-height workbench might be comfortable for a person but force someone shorter to lift their shoulders or reach forward. A chair with a seat can make it difficult to sit close enough to the work. Even a small difference in height can change how comfortably you hold a glass cutter or work on sections.
Here are some common problems:
- A workbench thats too high: You may have to raise your shoulders or bend your wrists to work comfortably.
- A chair thats too tall: Your feet may hang of resting securely on the floor or a footrest.
- A seat thats too deep: You may struggle to sit while keeping your feet supported.
- Poor lighting: You might lean closer to see the pattern creating neck and back strain.
- Tools placed far away: Reaching repeatedly across the work surface can make your shoulders and arms tired.
An uncomfortable working angle: Looking down at a pattern for long periods can encourage you to bend your neck and upper back.
The solution isn’t simply to buy tools. It’s to make the whole working area fit your body.
- Adjustable Stained Glass Workbench
get it here
If I could recommend one piece of equipment to consider first it would be an adjustable workbench.
Your work surface affects everything you do: cutting glass arranging pattern pieces grinding edges and assembling your project. If the bench is too high or too low you may find yourself constantly adjusting your body to compensate.
For stained glass artists an adjustable-height workbench offers much more flexibility than a standard fixed table.
What should you look for?
When comparing workbenches consider these features:
- height: Check the actual minimum and maximum height, not just the product description. The lowest setting is especially important for users.
- A stable construction: The surface should not wobble when you’re cutting or working with tools.
- Working space: You need room for your pattern, glass, tools and a safe area for handling materials.
- Leg clearance: Make sure the frame doesn’t prevent you from sitting close to the work.
- A surface: Choose a material that is practical for your type of stained glass work and can be protected from scratches and damage.
How high should your stained glass workbench be?
There isn’t one height for everyone. Your ideal work surface depends on your height whether you’re sitting or standing the task you’re doing and the tools you use.
A useful starting point is to sit or stand with your shoulders relaxed and your upper arms to your body. For light manual tasks a surface around elbow height is a reasonable starting point. Tasks requiring visual inspection may need a slightly different position.
Don’t choose a workbench simply because its advertised height sounds right. Measure your working position and compare it with the benchs adjustment range.
My tip: If you can’t afford a workbench yet consider a sturdy work platform or a suitable height-adjustment solution. It must be stable, level. Designed to support the equipment and work you’re doing. Avoid improvised stacks or anything that could shift while cutting glass.
- An Adjustable. Stool That Fits Your Height
get it here
A comfortable chair is just as important as a workbench. In fact the wrong chair can make a well-organized workspace uncomfortable.
Some standard workshop stools are too tall for users. Others have seats that prevent you from sitting close to the workbench.
When choosing a chair look beyond its appearance. You want something that allows you to sit comfortably while keeping your feet supported and your body in a position.
Features worth looking for
seat height
This is one of the most important features. Check that the seat setting works for your leg length. Some chairs have a high minimum setting.
Adjustable seat depth
A seat thats too deep can press against the back of your knees. Make it difficult to sit with your back supported. A shorter seat depth or adjustable seat pan can help.
Back support
A supportive backrest can make longer sessions more comfortable. Look for a design that supports your lower back without forcing you into a position.
Stable base
If you choose a chair with wheels make sure it’s stable and appropriate for your workshop floor. A stationary stool may be an option when you need a steady position near sharp glass and tools.
Don’t forget the footrest
If you raise your chair to reach the workbench comfortably your feet may no longer reach the floor.
A stable footrest can help support both feet and make it easier to sit. Look for one that’s wide enough doesn’t slide around and provides a secure surface.
You shouldn’t have to sit on the edge of your chair or let your feet dangle to reach your work.
A simple setup tip: Sit back in your chair relax your shoulders and place both feet on the floor or a stable footrest. Then check whether you can reach the work surface without leaning. If you can’t adjust the chair or workbench than forcing your body into position.
- An Ergonomic Glass Cutter
get it here
A glass cutter is one of the tools you’ll use most often so it’s worth finding one that feels comfortable in your hand.
You don’t necessarily need a cutter because you’re a shorter person. Hand size and grip comfort matter more than body height.
A cutter that feels large too slippery or uncomfortable to hold can make precise work more difficult.
What to consider when buying a glass cutter
- Grip shape: Look for a handle that feels comfortable without forcing you to squeeze tightly.
- Handle thickness: If you have hands a very thick handle may feel awkward.
- Weight: A tool that feels balanced can be easier to control.
- Cutting-head design: Choose a cutter for the type and thickness of glass you’ll be using.
- Replacement parts: Check whether replacement wheels or other maintenance parts are available.
Some cutters have pistol-style or ergonomic handles while others have pencil-style designs. Neither style is automatically better for everyone.
If possible hold a few designs before buying. A comfortable grip is more useful than a list of features you may never use.
Important: Good ergonomics won’t replace glass-cutting technique. Learn how to score glass and follow the tool manufacturers instructions.
- Running Pliers and Grozing Pliers That Are Comfortable to Hold
After scoring glass you’ll need tools to help separate and refine the pieces.
Running pliers are commonly used to help open a score line while grozing pliers are used for nibbling away small amounts of glass.
If you have hands pay attention to the handle size, opening range and overall weight.
What makes pliers comfortable?
- Handles that fit your hand without stretching.
- A comfortable grip that doesn’t require force.
- A tool weight you can manage easily.
- A design appropriate for the thickness and type of glass you’re working with.
Don’t assume that the smallest pliers are automatically the best. They still need to be suitable for the job.
Try to keep your wrist in a position and avoid gripping harder, than necessary. If a tool repeatedly causes discomfort stop and reassess the way you’re holding it.
- A Glass Grinder With a Comfortable Working Height
A glass grinder can make a difference when you’re fitting pieces together. It helps refine glass edges so the sections can fit the pattern accurately.
However the position of the grinder matters.
If its too high you may have to lift your shoulders. If its too low you might bend your neck and back to see the glass clearly.
What should shorter users look for?
- A comfortable working surface: Check the height of the grinder. Whether it can be placed on a suitable stable surface.
- A view of the glass: You should be able to see the edge you’re working on without leaning excessively forward.
- A suitable splash guard: Water and glass particles should be managed according to the grinder manufacturers instructions.
- Access to controls: You shouldn’t have to stretch across the machine to switch it on or adjust it.
- A working area: Make sure you have enough room to handle the glass safely.
A small stable platform may help position a grinder at a comfortable height provided it is suitable for the machine supports its full weight and does not interfere with ventilation, water management or stability.
Don’t overlook grinder safety
Grinding creates glass particles and wet debris. Follow the manufacturers safety instructions use eye protection and keep the grinders water system and splash protection in good condition.
Avoid sweeping glass dust. Follow cleanup procedures and local safety guidance.
- Good Task. A Magnifying Lamp
Lighting is easy to overlook when buying stained glass equipment. It can make a noticeable difference.
If you can’t clearly see your pattern or the edges of your glass you may naturally move your head closer to the work. Repeating this for periods can make your neck and shoulders uncomfortable.
A good task lamp helps you see what you’re doing without needing to lean
Features to look for
- An arm that lets you position the light where you need it.
- A stable. Secure clamp.
- Brightness adjustment for tasks.
- A light that doesn’t create distracting glare on the glass.
- A suitable color temperature that makes it easier to judge glass colors.
- A magnifying lamp can also be useful for work especially if you find small pattern sections difficult to see.
However magnification isn’t a substitute for working distance. Position the lamp so you can see the work comfortably while keeping your neck in a position.
My recommendation: Start with an adjustable task lamp. If you regularly work on details and need more visual assistance consider adding a magnifying lamp.
- An Adjustable Pattern Holder or Tilting Work Surface
Adjustable drawing board or pattern holder
One of the common problems when working with stained glass patterns is looking down for too long.
You may be checking a printed design comparing individual glass pieces or planning where each color should go. If the pattern is always flat on the table it’s easy to spend a time with your neck bent.
A tilting pattern holder or adjustable drawing board can help bring the design to your natural line of sight.
Why it can be useful
- It makes printed patterns easier to view.
- It can reduce the need to lean over your work.
- It keeps the pattern separate from messy work areas.
- It can help you compare the design with your glass pieces.
Choose a holder with an angle that can be adjusted. Make sure it doesn’t take up much space or interfere with your tools.
You can also use a stand for your pattern instead of tilting the entire workbench.
- Tool Storage That Keeps Everything Within Reach
parts organizer or tool storage system
A comfortable workspace isn’t about the height of your furniture. The way you arrange your tools matters too.
If your frequently used tools are always at the back of the bench you’ll spend a lot of time reaching forward or twisting your body.
For a stained glass artist a well-organized workspace can be especially helpful.
A practical way to organize your tools
Keep the tools you use often close to your main working area:
- Glass cutter.
- Running pliers.
- Grozing pliers.
- Measuring tools.
- Marker.
- Cleaning materials.
Store heavier or frequently used equipment where it can be accessed safely without stretching or climbing.
Use containers for small items so they don’t become mixed with glass scraps.
Also keep tools and broken glass in appropriate containers rather than leaving them loose on the work surface.
A simple organizer can save time reduce reaching and make a small workshop feel much more manageable.
- Anti-Fatigue Mat for Standing Work
If you prefer standing while cutting or arranging glass, an anti-fatigue mat may be worth considering.
Standing in one position for a time can become uncomfortable particularly on hard floors.
A suitable mat provides a cushioned surface under your feet. However it should not be so soft or unstable that it makes your balance worse.
Choose a mat that:
- Lies flat and doesn’t slide.
- Is suitable for your workshop environment.
- Has edges that won’t create a tripping hazard.
- Is easy to clean.
- Doesn’t interfere with stools, equipment or foot movement.
Remember that a mat isn’t a replacement for changing positions. Alternating between sitting and standing when can make a long work session more comfortable.
Safety Equipment You Should Never Skip
When discussing stained glass equipment it’s important not to focus on comfort. Working with glass, solder, flux and grinders also involves safety considerations.
Depending on your technique and materials your workshop may involve glass edges, glass particles, hot tools, chemical products and potentially lead exposure.
Here are some important precautions.
Safety glasses
Use eye protection when cutting, breaking, grinding and handling glass. Make sure the protection is suitable for the task and follows the tool manufacturers guidance.
Protective clothing and suitable gloves
Wear clothing that protects your skin from glass cuts. Use gloves appropriate for the task. Check the instructions for any powered equipment. Gloves should never create an entanglement risk around moving machinery.
Ventilation and soldering fume control
Soldering can produce fumes depending on the solder and flux used. Work in a ventilated area with suitable local exhaust ventilation where required. Read the product labels and safety data sheets for your materials.
Don’t assume that an ordinary room fan or an open window is protection.
Lead awareness. Hygiene
Some traditional stained glass materials contain lead. Avoid eating, drinking or touching your face while working. Wash your hands after handling materials and clean work surfaces using appropriate methods.
Where suitable for your project consider lead- materials and solders while still checking the hazards associated with the flux and other products you use.
Safe grinder cleanup
Glass grinding can produce particles. Follow the equipment manufacturers instructions for water use splash protection and cleaning. Avoid sweeping glass debris.
For detailed guidance see the Consumer Product Safety Commissions Art and Craft Safety Guide and Health Canadas information on chemical safety in art classes.
Beginner-Friendly Stained Glass Patterns to Try
Once your workspace is comfortable the next step is choosing a design that matches your experience.
This is especially important if you’re just starting out. A complicated pattern can make your first project unnecessarily frustrating even if you have equipment.
I always recommend looking for designs with outlines, larger glass sections and details that are practical to cut and assemble.
Here are a few types of designs worth exploring.
- Animal Stained Glass Patterns

Animal designs are a lovely way to start because they can be recognizable without needing dozens of tiny pieces.
Look for a silhouette broad sections and a limited number of facial details. A fawn, bird, cat or other animal can make a decorative piece when the pattern is designed with practical glass construction, in mind.
[Add your Fawn Stained Glass Pattern Etsy link if this is the design you want to feature.]
- Nature-Inspired Stained Glass Patterns
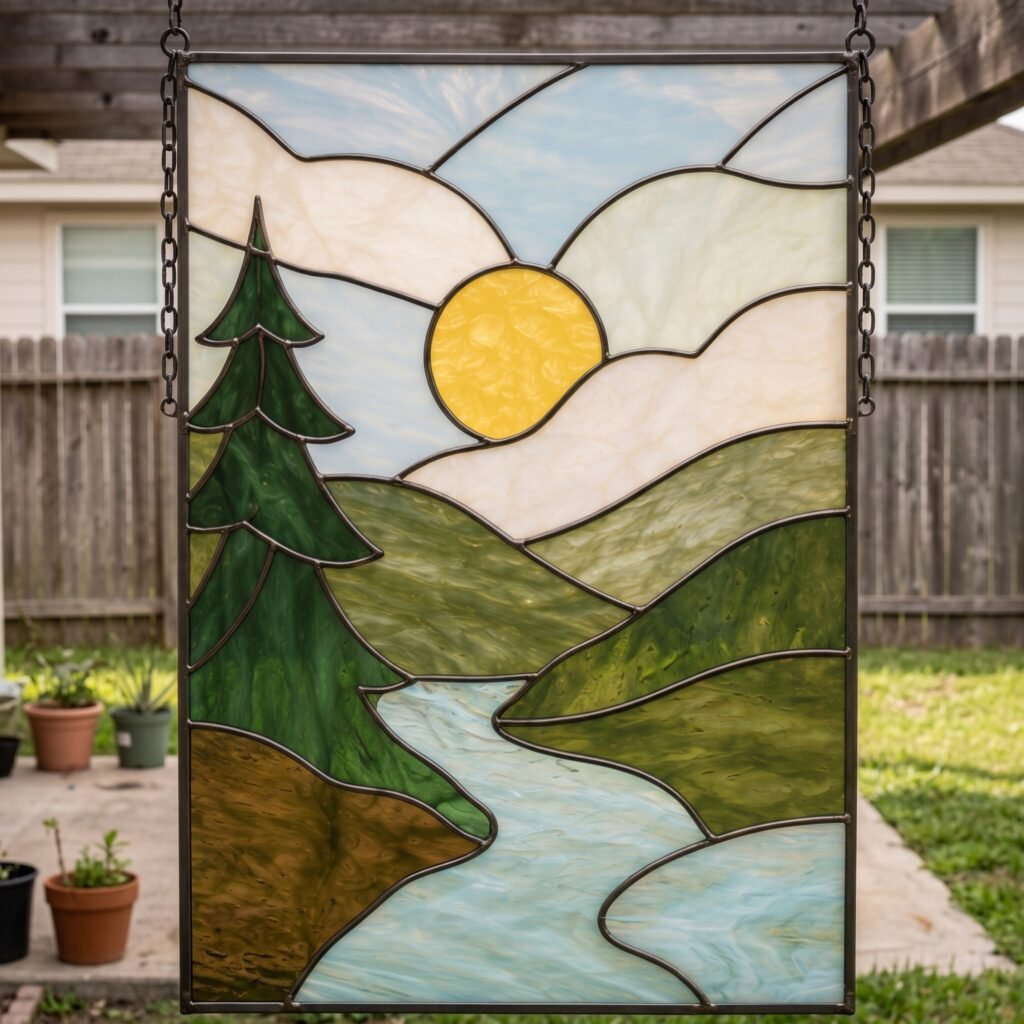
Nature offers inspiration for stained glass. Leaves, flowers, shells and simple plants can look beautiful with a few glass colors.
For beginners pick designs with curves. Avoid patterns that break every vein or texture into its own piece.
- Simple Decorative Stained Glass Patterns
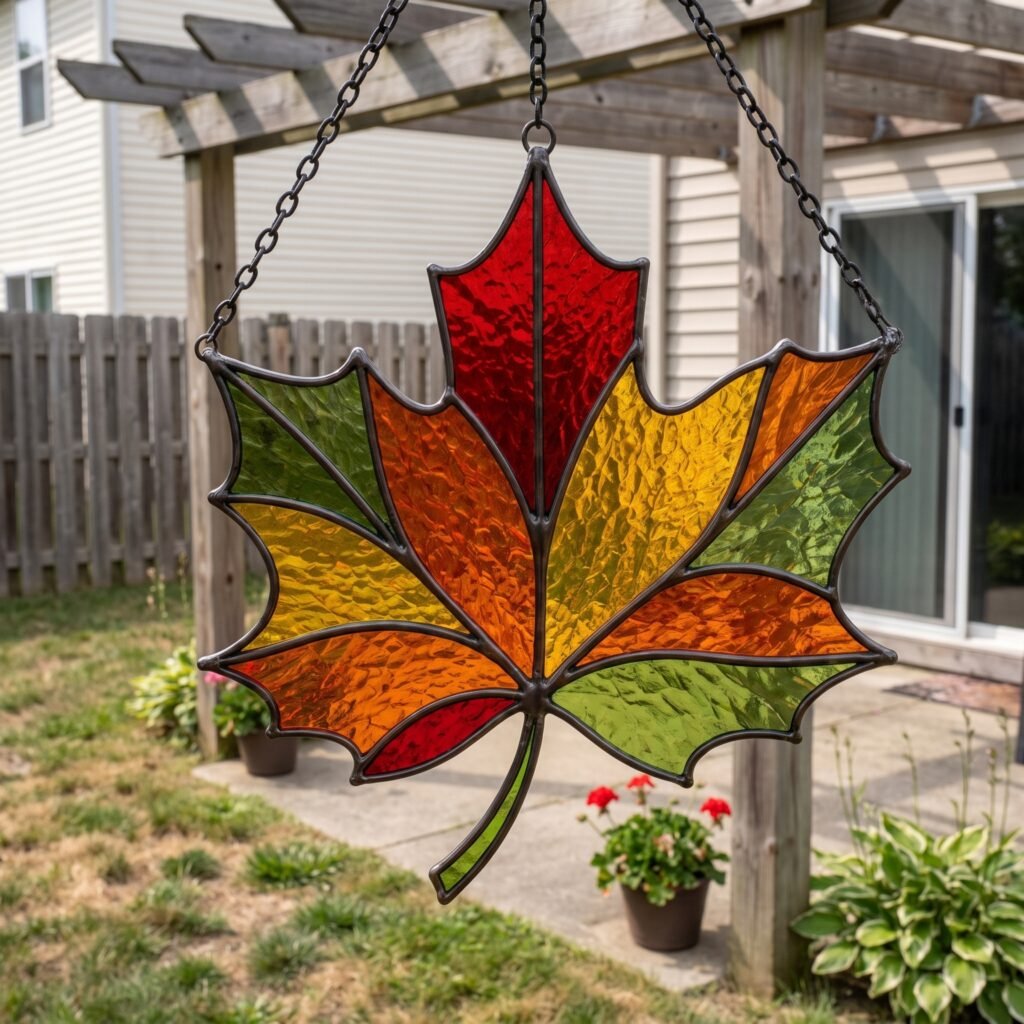
If you want something less detailed, geometric and decorative designs can be a great place to start.
A simple shape with a color palette can look stunning in a window. It doesn’t need construction to make an impact.
What makes a pattern beginner-
Before buying or printing a pattern look beyond the finished image. Check:
- How many glass pieces are in the design.
- If any pieces are too small.
- If there are strips.
- If there are inside corners.
- If the lines on the pattern are clear.
- If the pattern fits your chosen construction method.
A pattern with pieces isn’t always easier. The size, shape and placement of each piece matter as much.
Explore beginner-friendly stained glass patterns in my Etsy shop: Browse the collection here.
What Should You Buy First? A Practical Budget-Friendly Approach
Setting up your stained glass workspace can feel overwhelming. You might think you need every tool at once.
You don’t.
Start with what you need for your technique. Build your space as you learn what works best.
Start with the essentials
Focus on:
- A work surface at a comfortable height.
- A suitable. Stool.
- A footrest if your feet don’t reach the floor.
- A glass. The right pliers.
- Safety. Protective gear.
- Tools needed for your chosen method.
Add comfort improvements next
Once the basics are in place consider:
- An task lamp.
- A better tool organizer.
- An adjustable pattern holder.
- A comfortable chair.
- An adjustable workbench if your current one doesn’t fit.
Upgrade specialist equipment when needed
A grinder, special soldering tools and other workshop machines may be useful depending on the projects you plan.
Buy equipment that matches your technique and materials. Don’t spend on machines if you’re still learning. You don’t need them yet.
Frequently Asked Questions
Is there stained glass equipment made for short people?
There isn’t a category of tools just for shorter people. Most standard tools work fine. The biggest help comes from choosing furniture, a comfortable chair, a good footrest and tools that fit your hands.
What is the best workbench height for a stained glass artist?
There’s no one size that fits all. Every person has proportions and working habits. Measure your elbow height when sitting or standing. Compare it to the workbenchs height range. You may also need to adjust the position of the workbench for tasks like cutting, grinding or assembling.
Can I use an office chair for stained glass?
Possibly if it’s stable, comfortable and fits your body. Check the seat height, seat depth, support and whether your feet can rest flat. Also make sure it works in a workshop setting and doesn’t block your tools or movement.
Do I need a workbench?
Not always. A fixed bench can work if it fits your body and your tasks.. An adjustable workbench gives more flexibility—especially if you switch between sitting and standing or work on different kinds of projects.
How can I avoid neck and back discomfort while making glass?
Start by setting up your chair, work surface, lighting and pattern so you don’t have to bend or stretch much. Keep tools you use often within reach. Change positions often and take breaks. If pain keeps coming stop and talk to a professional.
What is the easiest stained glass project for a beginner?
A small design with lines, larger glass pieces and a manageable count is usually a good start. Simple animals, leaves, geometric shapes and decorative motifs can all work well—depending on how the pattern’s broken up.
Final Thoughts: Your Workspace Should Fit You
You don’t have to be tall to enjoy glass. You shouldn’t have to fight with furniture that doesn’t fit your body every time you work.
The best investment isn’t the expensive glass cutter or the biggest grinder. It’s building a space where you can sit or stand comfortably see your work reach your tools easily and work safely.
Start with the basics: a workbench, a comfortable chair, proper foot support and good lighting. Then add tools as your skills grow.
And remember, your first project doesn’t need to be complicated. Pick a pattern you truly like. Make sure the pieces are practical to handle. Then enjoy learning, one step, at a time.
Happy glass making!